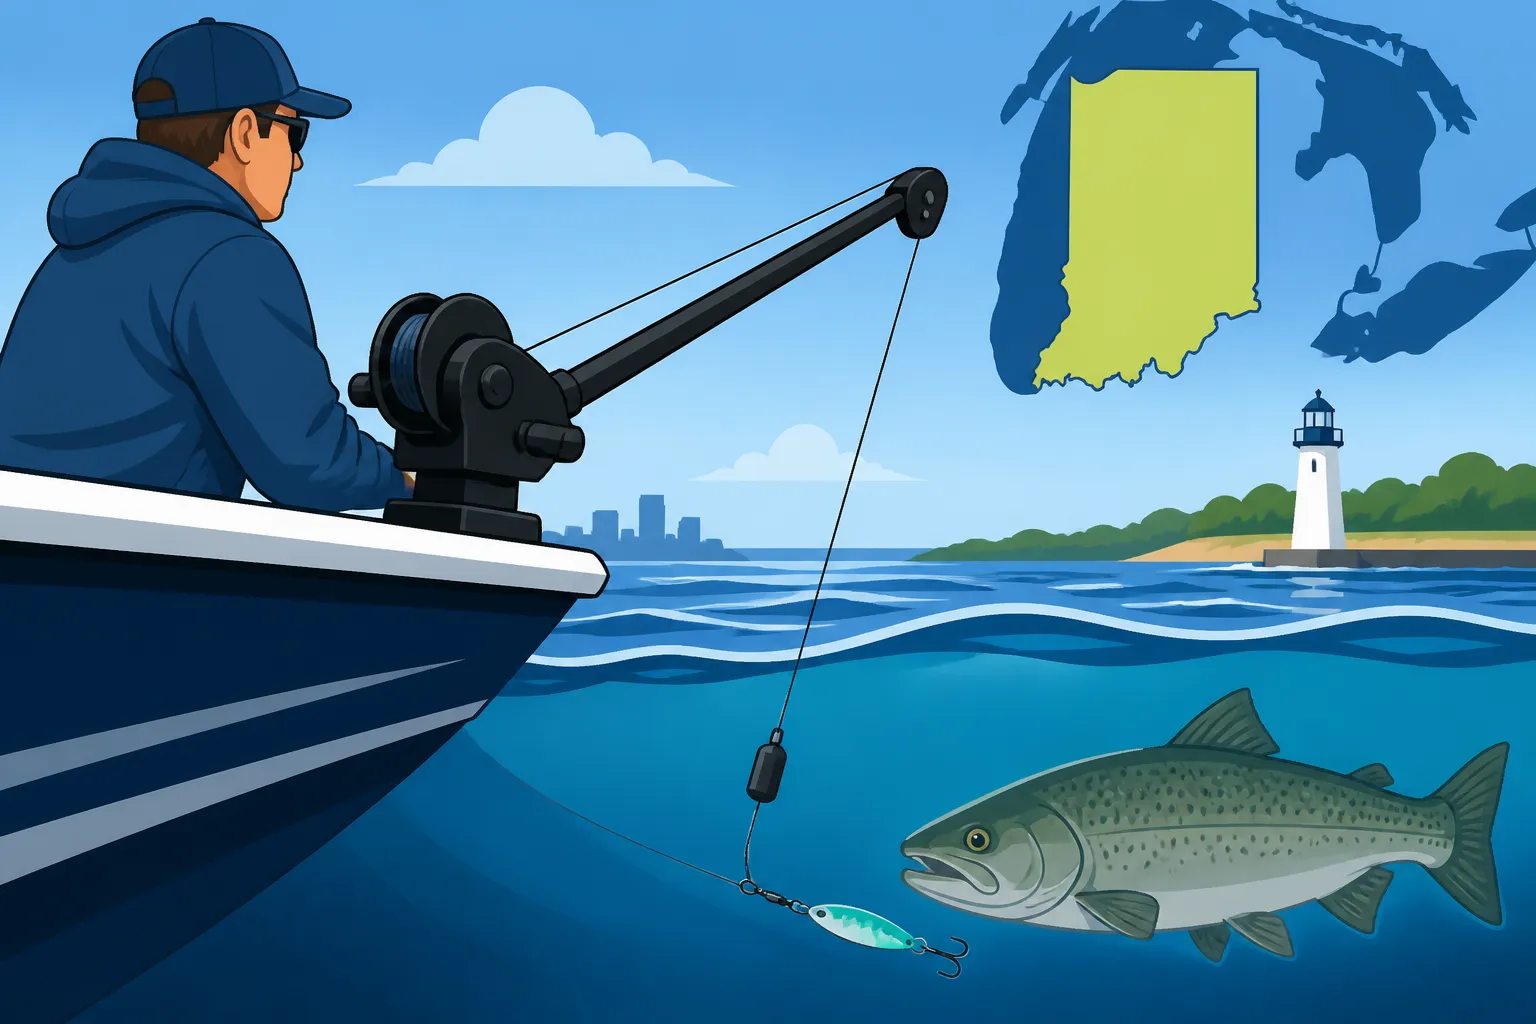
Downrigger Basics for Indiana Lake Michigan Anglers
For anglers who dream of bringing in those magnificent salmon and steelhead from the vast, deep waters of Lake Michigan, there's often a frustrating barrier: how do you get your lures down to where the fish are actually feeding? It’s not like fishing a small pond where a simple bobber and worm do the trick. Lake Michigan’s depths can be immense, and trying to reach fish suspended far below the surface with conventional tackle is like trying to hit a moving target in the dark. This guide will take you through the essential world of downriggers, demystifying this crucial piece of equipment so you can conquer those depths and dramatically improve your success on Indiana’s Lake Michigan waters.
What is a Downrigger and Why You Need One on Lake Michigan?
Lake Michigan isn't your average fishing hole; it's an inland sea with incredible depths, intricate thermoclines, and diverse fish populations that often suspend themselves far below the surface. Trying to consistently present your lure at, say, 70 feet down in 150 feet of water, while your boat is moving and the currents are shifting, is incredibly difficult without specialized gear. This is precisely where downriggers become not just helpful, but absolutely essential for serious anglers targeting species like Chinook salmon, Coho salmon, and steelhead.
The Challenge of Deep Water Fishing
Imagine this: you've got your boat out on Lake Michigan, the sonar is showing baitfish schools at 60 feet, and bigger marks — likely salmon or trout — are lurking just beneath them at 70-80 feet. You cast out your favorite spoon, but without any extra weight, it barely gets past 15 or 20 feet before your boat's forward motion pulls it back towards the surface. You could add heavy lead weights, but then you lose all the natural action of your lure. It just plummets, and retrieving it feels like cranking in a brick. Not only that, but if you want to run multiple lines at different depths, the tangles and guesswork become unbearable. The sheer volume of water and the constant motion of the boat make depth control a nightmare for traditional trolling methods.
The water column in Lake Michigan can be stratified, meaning different temperatures exist at different depths. Many sought-after species, especially salmon and trout, will stack up along these temperature breaks, known as thermoclines, or chase baitfish that are themselves holding at specific depths. Without a way to precisely and repeatedly put your lure into that exact strike zone, you're essentially just hoping a fish swims up to your presentation, which is a low-percentage game on such a vast body of water.
How Downriggers Solve the Depth Problem
A downrigger is essentially a sophisticated winch system that allows you to accurately present your fishing lure at a specific, predetermined depth, regardless of your boat's speed or the weight of your lure. It does this by using a heavy lead ball, often referred to as a "downrigger ball" or "cannonball," attached to a strong cable. Your fishing line, with its lure, is clipped to this cable just above the ball using a release clip. The downrigger then lowers the ball and your line to the desired depth.
When a fish strikes your lure, the tension of the bite (or a sharp tug from you) causes your fishing line to "release" from the clip. This allows you to fight the fish directly on your rod and reel, without the drag of the heavy downrigger ball. It’s a genius system because it lets your lure swim freely, unimpeded by heavy weights, while still keeping it precisely where the fish are. You can also run multiple downriggers on a boat, each set to a different depth, allowing you to cover more of the water column and dial in on the fish's preferred depth. Think of it as a vertical elevator for your fishing lures.
Targeting Lake Michigan's Deep Dwellers
For anglers fishing the Indiana waters of Lake Michigan, downriggers are a game-changer when targeting species that notoriously hold deep, like Chinook salmon and lake trout. These fish often prefer the cooler, deeper waters, especially during the warmer months. Steelhead, while known for their acrobatic surface fights, will also go deep to feed. Lake Michigan's Salmon Run: Indiana's Fall Fishing Season is a prime example of when downriggers shine, allowing you to reach those fish that are staging offshore before moving into the rivers.
Without a downrigger, you'd be severely limited in your ability to present baits effectively to these deep-holding fish. You might catch a stray fish on a planer board or lead core line, but for consistent action, especially when fish are in 50, 70, or even 100+ feet of water, a downrigger is the most efficient and reliable tool. It gives you the control and precision needed to put your lure right in front of their faces, increasing your chances of that thrilling strike.
Key Components of a Downrigger System
Understanding the individual parts of a downrigger system will not only help you operate it more effectively but also assist you in troubleshooting any issues that might arise. Each component plays a vital role in getting your lure to the right depth and ensuring a successful hook-up. When you’re browsing for downriggers, whether at a local sporting goods store or on a website like Bass Pro Shops, knowing these parts will make your decision much easier.
The Boom, Reel, and Cable
At the heart of any downrigger is its main structure: the boom, the reel, and the cable.
The boom is the long arm that extends out from the main unit. Booms vary in length, usually from 24 inches up to 60 inches or more. Longer booms allow you to spread your lines further from the boat's prop wash, reducing tangles and giving a wider presentation. This is particularly useful when running multiple downriggers or if you're concerned about your fishing lines interfering with your boat's motor or other lines. The boom also provides the leverage needed to deploy and retrieve the heavy downrigger ball smoothly.
The reel is essentially a large spool where the downrigger cable is stored. This is the mechanism that raises and lowers the downrigger ball. Manual downriggers have a crank handle you turn to operate the reel, while electric models use a motor, controlled by buttons, to do the heavy lifting. The reel needs to be robust, capable of handling the heavy strain of the downrigger ball and the forces of trolling.
The cable itself is a critical component. Most downriggers come spooled with stainless steel cable, typically 150-300 feet in length, and with a breaking strength well over 100 pounds. This cable is incredibly durable and resistant to corrosion, but it can develop kinks or fray over time, especially if it rubs against the boat or the bottom. Some anglers opt for braided line instead of wire, as it's often quieter in the water (which some believe spooks fish less) and easier to handle, though it can stretch more and might require specialized crimps. Regular inspection of your cable for wear and tear is crucial for safety and preventing lost gear.
Downrigger Balls and Releases
These two components work in tandem to get your lure to depth and then free it when a fish bites.
Downrigger balls, sometimes called cannonballs or weights, are heavy, hydrodynamic weights that pull your cable and attached fishing line straight down. They typically range from 6 to 15 pounds, with 8-12 pounds being common for Lake Michigan trolling. Heavier balls are needed for faster trolling speeds or in strong currents to prevent "blowback"—where the ball doesn't stay directly below the boat but instead trails far behind. Some balls have fins or specific shapes designed to reduce drag or even "steer" them slightly to the side, further spreading your presentation. Using heavier balls generally means more accurate depth control, but also more strain on your downrigger and more effort to retrieve manually.
The release clip is arguably the most ingenious part of the system. This small device attaches to the downrigger cable (or a short leader off the cable) and holds your fishing line. When a fish strikes, the sudden pull on your fishing line causes it to "release" from the clip, allowing you to fight the fish directly without the heavy downrigger ball acting as dead weight. Release clips come in various styles, offering different levels of tension. Some clips are designed for light bites, suitable for smaller trout or wary salmon, while others are heavy-duty for fast trolling with large lures, ensuring your line doesn't release prematurely. Experimenting with different clips and tension settings is part of mastering downrigger fishing. You'll often find a good selection of these small but mighty accessories when shopping for downrigger gear on Amazon.
Rod Holders and Mounts
You can't just hold your rod while it's clipped into a downrigger; you need secure, strong rod holders. Downrigger rods are usually shorter and have a softer tip to absorb the pressure from the downrigger ball and cable, but they need to be held firmly.
Rod holders for downrigger fishing are heavy-duty, often made of durable aluminum or reinforced plastic, and are designed to pivot or adjust to various angles. They mount securely to your boat, usually to the downrigger itself or to a separate mounting system nearby. The angle at which your rod is held can be important for both visibility of a strike and for optimal lure presentation. When a fish hits, the rod tip will "snap" up as the line releases from the downrigger clip, often referred to as a "strike." A good rod holder ensures your rod is ready for that moment without risking it being pulled into the water.
Mounts are how the downrigger unit itself attaches to your boat. Most downriggers come with a base plate that is bolted directly to the boat's gunwale or transom. However, many anglers prefer swivel bases. A swivel base allows the entire downrigger unit to rotate, making it much easier to deploy and retrieve the downrigger ball, especially when you have a big fish on and need to clear the way quickly. This flexibility can be a huge advantage when fighting a large salmon and maneuvering around other lines or equipment. The stability of your downrigger mount is paramount; it needs to withstand the constant strain of the heavy ball, boat movement, and the forces of a fish strike.
Types of Downriggers for Indiana Anglers
When you're ready to invest in a downrigger for your Lake Michigan adventures, you'll primarily encounter two main categories: manual and electric. Each has its pros and cons, and your choice will often depend on your budget, fishing frequency, and the kind of experience you're looking for. Beyond that, the mounting style – fixed versus swivel base – also offers different levels of convenience.
Manual Downriggers: The Budget-Friendly Option
Manual downriggers are the workhorses of the deep-water fishing world, offering a straightforward and often more affordable entry point. As the name suggests, you operate them by hand-cranking a handle to raise and lower the downrigger ball. This means a bit more physical effort on your part, but they are incredibly reliable and require less complex wiring or power sources.
The biggest advantage of a manual downrigger is its cost-effectiveness. They are generally significantly less expensive than their electric counterparts, making them an excellent choice for anglers just starting out with deep-water trolling or those who don't fish Lake Michigan frequently. Their simplicity also translates to fewer parts that can break down, reducing potential maintenance issues. If you're out on the water and your boat's electrical system has a hiccup, a manual downrigger will still get the job done.
However, the manual operation can become quite tiring over a long day of fishing, especially if you're constantly checking depths, changing lures, or bringing up heavy downrigger balls (8-12 pounds) to re-clip a fish or clear a snag. Imagine cranking up 100 feet of cable with a 10-pound ball multiple times – it’s a workout! This can be particularly true if you're running several downriggers at once. Despite the effort, many seasoned anglers still prefer manual downriggers for their rugged simplicity and direct control. They're a solid, dependable choice if you're willing to put in the physical work.
Electric Downriggers: Power and Precision
For those who prioritize convenience, speed, and advanced features, electric downriggers are the way to go. These units are powered by your boat's 12-volt electrical system and operate with the push of a button, letting a motor do all the heavy lifting of raising and lowering the downrigger ball. This makes depth adjustments quick and effortless, reducing angler fatigue significantly.
Electric downriggers truly shine when you're making frequent depth changes, retrieving balls to check baits, or if you're running multiple units. Many models come with features like automatic depth cycling, which can raise and lower your lures through a specific depth range, and auto-stop at the surface. Some high-end electric downriggers can even integrate with your boat's sonar or GPS system, allowing for incredibly precise depth control and presentation. This level of automation means you can focus more on steering the boat, watching your rods, and enjoying the fishing experience, rather than constantly cranking a handle.
The primary downsides are the higher initial cost and the reliance on your boat's electrical system. You'll need a robust battery setup and proper wiring to ensure consistent power to your downriggers. While generally very reliable, an electrical issue can render them useless, which is why a well-maintained electrical system is paramount for boats equipped with electric downriggers. For serious Lake Michigan salmon and trout anglers, the investment in electric downriggers is often considered well worth it for the added efficiency and comfort.
Fixed Mount vs. Swivel Base: Stability and Flexibility
Beyond manual or electric operation, how your downrigger attaches to your boat also impacts its usability.
A fixed mount means the downrigger is bolted directly and rigidly to your boat's gunwale, transom, or other mounting surface. Once installed, it doesn't rotate. This offers maximum stability and a very secure attachment, which is great for absorbing the forces of heavy balls and fighting big fish. The downside is that positioning the downrigger for deployment or retrieval, especially if it's placed awkwardly or has a long boom, can be a bit challenging. You might find yourself leaning over the side of the boat or stretching to reach the ball or release clip.
A swivel base, on the other hand, is designed to allow the entire downrigger unit to rotate horizontally. This is a huge convenience, especially on smaller boats or when space is at a premium. With a swivel base, you can swing the downrigger's boom inboard for easy access to the downrigger ball and release clip, making it much simpler to attach your fishing line, check your bait, or untangle a snag. Once your line is set, you simply swing the boom back out over the water. This is incredibly helpful when fighting a fish, as you can quickly rotate the downrigger to get the ball out of the way, preventing tangles and giving you a clearer path to land your catch. While swivel bases add a bit to the overall cost, most experienced Lake Michigan anglers would agree that the added flexibility and ease of use are well worth the investment. You'll find these accessories available at retailers like Bass Pro Shops or online at Amazon.
| Feature | Manual Downrigger | Electric Downrigger |
|---|---|---|
| Operation | Hand crank to raise/lower | Motorized, button-controlled |
| Effort | High physical effort, especially with heavy balls or frequent adjustments | Low physical effort, very easy |
| Speed | Slower deployment and retrieval | Fast, consistent deployment and retrieval |
| Cost | Generally more affordable | Significantly higher initial investment |
| Power Source | None required (self-contained) | Requires 12V boat electrical system |
| Fatigue | Higher angler fatigue over long periods | Low angler fatigue, enhances comfort |
| Advanced Features | Basic depth control | Auto-stop, depth cycling, sometimes sonar/GPS integration |
| Maintenance | Simpler, fewer moving parts | More complex, relies on electrical components |
| Ideal For | Beginners, infrequent users, budget-conscious anglers | Serious anglers, frequent users, large boats, multiple units |
Setting Up Your Downrigger: From Installation to Deployment
Getting your downrigger properly set up is key to its effectiveness and safety. It’s not just about bolting it to the boat; it involves careful assembly, spooling, and calibration to ensure everything works seamlessly when you’re out on the big water. Taking the time to do this correctly will save you headaches and potentially lost fish later.
Mounting Your Downrigger to Your Boat
The first crucial step is securely mounting the downrigger to your boat. Most downriggers are designed to be mounted on the gunwale (the upper edge of the boat's side) or the transom (the flat surface across the stern). You'll typically get a base plate with your downrigger that needs to be drilled and bolted to the boat. Always use stainless steel hardware and ensure you're reinforcing the mounting area from underneath with a backing plate, especially if your boat has thin fiberglass or aluminum. This prevents stress cracks and ensures the downrigger won't rip free under load.
Consider the placement carefully. You want the downrigger boom to extend out over the water, away from your engine, to prevent line tangles. If you have multiple downriggers, space them out to create a wide trolling spread. Think about where you and your crew will be standing and moving, ensuring the downriggers don't create obstructions. If you opt for a swivel base, make sure you still have enough room for the unit to rotate freely without hitting other equipment or structures on your boat. Proper mounting is paramount for both performance and safety; a downrigger under load can exert considerable force, and a loose mount is a recipe for disaster. Lake Michigan Trolling Gear Guide for Indiana Anglers provides more insight into how your downriggers fit into your overall boat setup.
Spooling the Cable and Attaching the Ball
Once your downrigger is securely mounted, it's time to spool the cable. Most downriggers come pre-spooled with stainless steel cable, but if you're replacing it or using braided line, make sure to spool it evenly and tightly. Leave some slack at the end to attach your downrigger ball. This connection is vital, so use heavy-duty crimps and thimbles, or a sturdy knot if using braided line, to create a strong loop for the ball's attachment.
Attaching the downrigger ball itself is straightforward. The ball usually has a sturdy eyelet or ring, which you connect to the cable's end loop using a heavy-duty snap swivel or a quick-release clip. It’s important to use a swivel that can handle the weight and prevent cable twist, especially if you're using a ball with a fin. Before you even head out, do a test run with the ball in the water near the dock to ensure the cable spools smoothly and the ball descends without issue. Make sure the ball is securely fastened; losing a downrigger ball in deep water is not only frustrating but also an unnecessary expense.
Adjusting the Release Clip for Different Species
The release clip is where your fishing line meets the downrigger system, and getting its tension right is critical. You want it to hold your line securely while trolling, but release cleanly when a fish strikes. Release clips typically have adjustable tension mechanisms, often a screw or a lever, allowing you to fine-tune how easily the line pops out.
For lighter-biting fish like smaller steelhead or more subtle takes from wary salmon, you'll want a lighter tension setting. This means less force is needed to pull the line free. Conversely, if you're trolling fast, running large, heavy lures, or targeting aggressive species like big Chinook salmon, you'll need a higher tension to prevent premature releases. Some clips are designed with "stacker" capabilities, allowing you to attach multiple fishing lines to the same downrigger cable, each at a slightly different depth, by clipping them above each other. When using stackers, pay extra attention to tension settings to avoid tangles. It's a good practice to test the release clip tension before each outing, making sure it holds your line and lure firmly, but also releases with a strong tug. Getting this right is a nuanced skill that comes with practice, and it directly impacts how many fish you successfully hook versus how many just "tweak" your line and get away.
Fishing Techniques with Downriggers on Lake Michigan
Having a downrigger is one thing; knowing how to use it effectively to consistently catch fish on Lake Michigan is another. It’s a blend of understanding your gear, reading the water, and adjusting your strategy on the fly. Mastering downrigger techniques will elevate your Lake Michigan fishing game.
Running Multiple Lines at Different Depths
One of the greatest advantages of downriggers is their ability to deploy multiple lines precisely at various depths, allowing you to cover more of the water column efficiently. Typically, a boat will run at least two downriggers, one on each side, though many dedicated Lake Michigan anglers will run three or even four. With each downrigger, you can set a specific depth, which is fantastic for "patterning" fish – figuring out which depth they are actively feeding at on a given day.
For instance, you might run one downrigger at 60 feet, another at 75 feet, and if you're using stackers, you might have another line off the 75-foot downrigger cable at 50 feet. This creates a vertical "net" through the water, increasing your chances of finding the fish. When one rod gets a strike, it's a strong indicator of the productive depth, and you can then adjust your other downriggers to target that same zone. Remember to keep enough spacing between your lines and downrigger balls to prevent tangles, especially during turns or when reeling in a fish. Trolling Gear Setup for Indiana's Lake Michigan Salmon often discusses specific strategies for maximizing your spread.
Reading Your Sonar and Adjusting Depth
Your boat’s sonar (fish finder) is your best friend when downrigger fishing. It provides the crucial intelligence you need to decide where to set your lures. Before even deploying your downriggers, spend some time scouting with your sonar, looking for baitfish schools, temperature breaks (thermoclines), and individual fish marks. Pay attention to the depth at which these targets appear.
Once you’ve identified a promising depth, set your downriggers accordingly. Don’t be afraid to adjust! Fish are constantly moving, and their preferred depth can change throughout the day due to light conditions, currents, or baitfish movements. If you're not getting bites at your initial depths, make small adjustments, moving your lures up or down by 5-10 feet at a time. Watch for marks on your sonar – if you see fish at 80 feet, ensure at least one of your lures is running right there. Modern electric downriggers with depth counters make these adjustments easy. Always remember that your sonar shows you where the fish are, and your downriggers allow you to put your lure there.
The Importance of Boat Speed and Direction
Trolling speed and boat direction are just as critical as depth when downrigger fishing. Different lure types have optimal trolling speeds at which they exhibit their best action. Spoons, for example, often have a specific speed range where they flash and wobble most enticingly. Flasher-and-fly combinations also have a sweet spot. Experiment with speeds between 2.0 and 3.5 mph over ground, but always let the lures dictate the ideal speed. If you have a prop wash, try to keep your lures running outside of that turbulent water.
Your boat's direction can also make a huge difference. When trolling in a straight line, your lures present a consistent action. However, subtle turns, even gentle S-curves, can cause your lures to speed up or slow down on the inside and outside of the turn, respectively. These changes in speed and action can often trigger strikes from following fish. A wide turn can be especially effective for hitting active fish that might be scattered or for ensuring your lure passes through a specific hot spot. Pay attention to which side of the boat gets strikes during turns – it can tell you if fish are reacting better to an accelerating or decelerating lure. Good communication with your crew is essential for managing lines and making precise adjustments to boat speed and direction, particularly when you're fishing near known salmon congregation areas, like during the Fall Salmon Run Timing on Lake Michigan in Indiana.
Maintenance and Troubleshooting for Longevity
Downriggers are robust pieces of equipment, but like any mechanical device exposed to harsh marine environments, they require proper care and occasional troubleshooting to ensure they last for many seasons. Neglecting maintenance can lead to equipment failure, lost fishing time, and costly repairs.
Post-Trip Care and Storage
After every outing on Lake Michigan, especially if you've been fishing in rough water or saltwater (which Lake Michigan isn't, but still), a thorough rinse is essential. Flush your downriggers with fresh water, paying close attention to the reel, boom pivots, and any exposed metal parts. This washes away any accumulated grime, salt spray, or freshwater contaminants that can lead to corrosion. Allow them to air dry completely before storing.
Lubrication is another critical aspect. Periodically apply a light coat of marine-grade grease or oil to moving parts, such as the reel's gears and bearings, pivot points on the boom, and the mounting system (especially if you have a swivel base). This keeps things running smoothly and prevents seizing. Inspect your downrigger cable or braided line for kinks, frays, or abrasions. If you spot any significant damage, it's best to replace that section or the entire spool to prevent a catastrophic failure and the loss of your downrigger ball. When storing your boat for the season, it’s a good idea to remove the downriggers and store them indoors, perhaps lightly oiled, to protect them from extreme temperatures and prolonged exposure to the elements.
Common Issues and Quick Fixes
Even with proper maintenance, you might encounter a few common issues with downriggers. Being able to quickly diagnose and fix them can save your fishing day.
One frequent problem is the cable kinking or fraying. This often happens if the ball hits the bottom too hard, snags on something, or the cable rubs against the boat. If you see kinks or significant fraying, it's time to replace the cable. Fishing with a compromised cable is a gamble. Another issue can be the release clip not holding tension or releasing prematurely. Check the clip's adjustment screw; it might just need to be tightened. If the pads are worn, you may need to replace the rubber pads or the entire clip. Sometimes, a dirty clip can also affect its grip, so a good rinse and wipe-down might solve it.
For electric downriggers, electrical issues are the primary concern. If your unit isn't powering on, first check the battery connections and the inline fuse. Corrosion on terminals can interrupt power, so ensure they are clean and tight. If the motor sounds weak or struggles to retrieve, it could indicate a low battery or an internal motor issue that might require professional service. Always carry spare fuses and basic tools like a screwdriver and pliers on board for quick repairs. Best Marine Radios for Lake Michigan Boaters might also be helpful for communicating if you run into major issues and need assistance.
Safety Considerations When Operating
Operating downriggers, especially with heavy weights and moving parts, requires attention to safety. Always be aware of where the downrigger boom is swinging, particularly when deploying or retrieving the ball. A heavy downrigger ball can cause injury if it strikes someone. When lowering the ball, ensure no one's hands or fingers are near the moving cable or the reel.
If a downrigger ball gets snagged on the bottom or a submerged object, never try to pull it free directly with the downrigger. This can severely damage the unit, rip it from the boat, or even cause injury. Instead, try to maneuver the boat directly over the snag, which might free the ball. If that doesn't work, you'll likely have to break the cable by tying it off to a cleat and driving away, sacrificing the ball but saving your downrigger and boat. Always wear appropriate personal flotation devices, especially when performing tasks that require leaning over the side of the boat. Taking these simple safety precautions will ensure your downrigger fishing remains an enjoyable and productive experience on Lake Michigan.
Disclaimer
This article is for general informational purposes only and does not constitute professional advice. Laws, prices and regulations vary by location and change over time. Consult a qualified professional for guidance on your specific situation.